
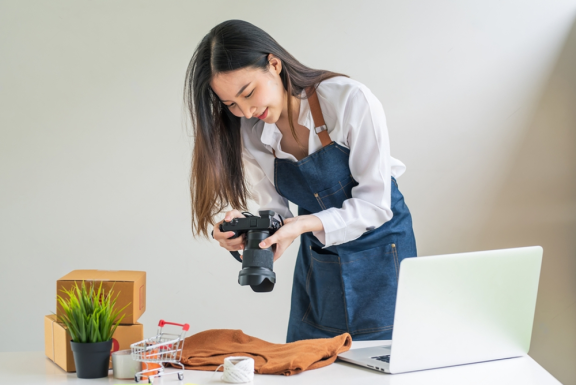
A picture is worth a thousand words. This oldest of adages never rings truer than when applied to online selling. Having high-quality product photos to showcase your inventory online is of paramount importance to your selling success. In fact, attractive imagery is probably the single most basic and essential elements of any online store.
Even if you're dropshipping your products, and can't actually take a photo of the inventory, it's important to try and get a photo from the supplier. Suppliers can sometimes be stubborn on this point. So if they refuse to furnish you with a photo, ask for a sample so that you can take one yourself.
Of course, once you've taken that photo, you may not know how to maximize a product image's selling potential. And that's the topic of today's SaleHoo blog post: how to get great photos of your products.
Photography 101

Good photography depends on a combination of factors, including your equipment and the environment you're shooting in. Let's take a look at the role each of these factors.
A camera
You can't start taking marvelous product photos until you've got a camera to shoot with. Take a look at a few of the best brands and models below.
Though it's better to use a decent camera, you can actually take very good pictures with some smartphones. Many smartphones come equipped with useful manual settings like exposure control, white balance, and post processing.
If you learn to operate these tools, you'll increase the quality of your pictures. If your smartphone doesn't have such embedded functionality, (forgive my cliché) there's an app for that:
All of the above are tools that will allow you to fiddle with your phone's camera settings manually. Some even have photo editing controls for post-production work, and sharing buttons to distribute your product photos across social media channels.
Lighting
Lighting is a complex subject and could in fact be an extensive article all its own, or a book for that matter. There are, however, some basics that anyone can pick up.
The first thing to note is that there are many different types of lighting:
- Sunlight
- Artificial lighting
- Spotlighting
- Back lighting
- Diffuse lighting
- Ambient lighting
- Hard Lighting
- Rim lighting
- Side Lighting
- Top lighting
And those examples are just a few. If you want to become a photo master, do some research on every type. For the purposes of product photos, we'll mainly be talking about diffuse, top, and back lighting.
Diffuse light, also known as "soft light," is light that's been reflected off of another surface, such as a white background, to spread the focus a bit thinner. Top and back lighting are simply light sources aimed from those directions.
In general there are a few steps that you want to follow in lighting subject for product photography.
- Use lots of diffuse light.
- Back light the subject.
- Top light the subject.
- Place the subject in front of a white background to reflect the light and eliminate as much shadow as possible.
- Make certain there's no glare and very little shadow—just enough to show definition.
- If you're using natural (sun) light, wait for a partly sunny day to shoot outdoors. Or, use a large window for indoor sunlight, and follow all the above directions using white paper for reflection.
- DO NOT mix sunlight with artificial light.
- For more information on DIY lighting, check out this YouTube tutorial.
A tripod
Tripods are necessary for taking clear pictures without blur, especially if you're using a longer exposure. There are even tripods for smartphones available.
Wide ppertures
Apertures are the openings in a camera's lens which determine the amount of light they take in as well as the depth of field. Depth of field, in turn, regulates sharpness between the foreground and background.
The ideal aperture to use for product photos is a wider one, because it makes for sharper images. Apertures are measured in f-stops (written as "f/" in front of a number). This is a measurement unique to photography, and an f-stop starts low and goes higher. The lower an f-stop, the wider the aperture. So f/2 is a good place to start, assuming your camera and lens are capable of it. If not, choose the lowest aperture available.
Aperture is adjusted differently on each camera, so check your manual for specifics. Often you'll use a hand dial on top of the camera. After you've set your aperture, experiment with the photos to see what looks best, and adjust the aperture as necessary.
A clean subject
You don't want smudges and dirt all over your photo, do you? Dirt, dust, fingerprints, and other markings are quite likely to show up in high-definition digital photos, so you need to give your subject as thorough a scrubbing as you can before taking pictures.
It's also smart to handle the subject with latex gloves to avoid adding to the problem.
The pictures
Once all the prep work is finished, just start snapping shots. Experiment with angles and lighting. Take plenty of photos so that you have a lot of choices.
And above all... Have fun! You're an amateur professional photographer now. Get into it!

Different types of product photography
There are a ton of different photography styles you can use to show off your product's best features. Whether you want a polished, professional look or something more fun and relatable, there's a style that can help you drive sales.
Here's a breakdown of the most popular types of product photography and when you use them:
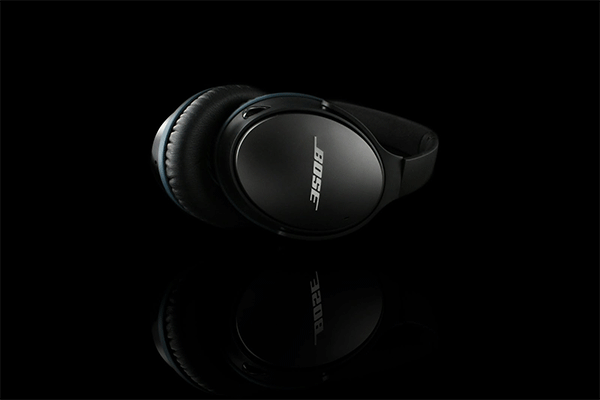
1. White background photography
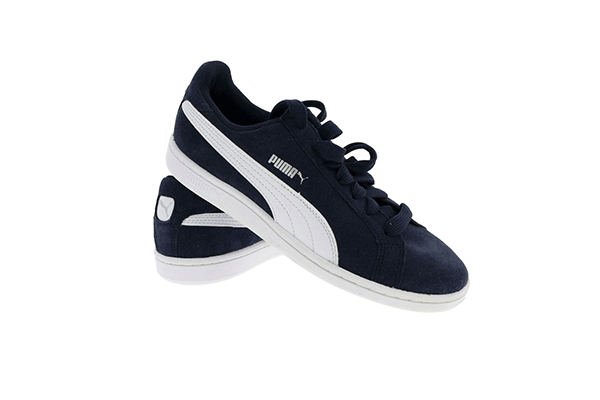
This is the classic eCommerce style. It features the product against a clean, white background. You can eliminate distractions and put the spotlight solely on your product. This allows the product's details and colors to pop. It's a tried-and-tested style that works for any product.
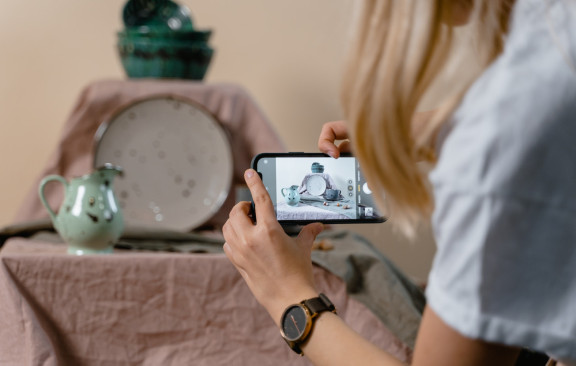
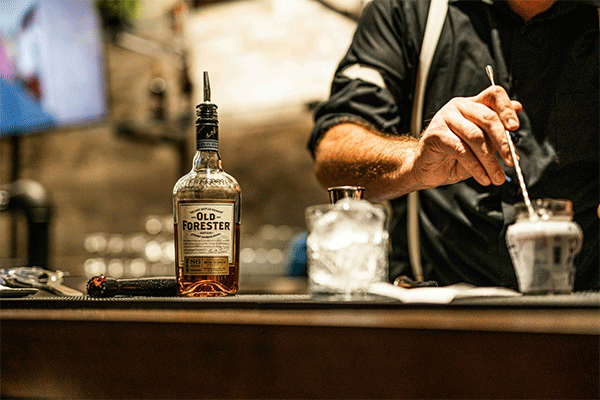
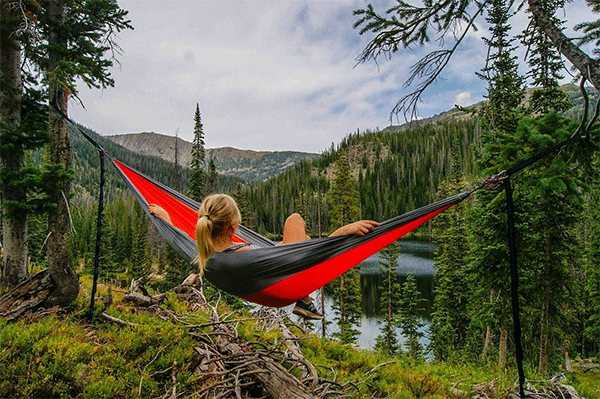
2. Lifestyle photography
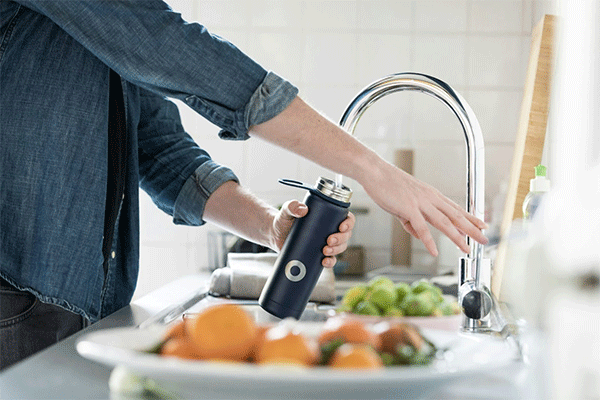
Lifestyle photos help customers visualize how the product fits into their lives. By showcasing the product in its intended environment, you can tell a story that resonates with potential buyers. It makes them more likely to see the product as a part of their everyday lives.
3. Detailed close-ups
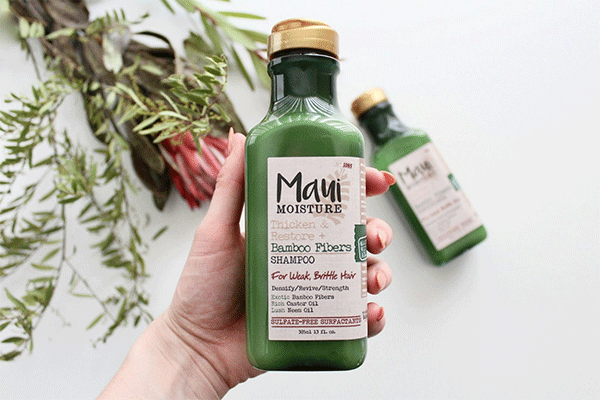
Close-up shots highlight the details of a product. You can show off its texture, quality, and craftsmanship. It also works well when you need to show the ingredients of a product. This style is particularly useful for luxury items and products where every detail matters, like jewelry. By zooming in on the finer points, you can emphasize the superior quality of your products.
4. Flat lay photography

Flat lay photography involves arranging products on a flat surface and shooting from above. It's popular for fashion items, accessories, and food products. This style is great for social media. It creates clean, eye-catching images that can showcase multiple items at once.
5. Scale shots
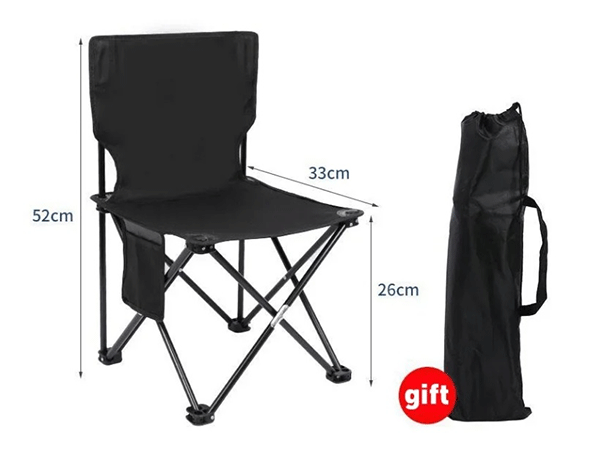
Ever bought something online and been surprised by its size? Scale shots solve that problem by including other objects or specific metrics for reference. They help customers understand the product's true size. This is crucial for avoiding size-related surprises and returns. Including familiar objects like coins, hands, or everyday items in the shot can give customers a clear sense of the product's dimensions.
6. Group photography

Group photography showcases multiple products together in one shot. It's great for highlighting the variety of your products. You can make it easier for customers to see their options. This style works well for bundled products or collections. It allows customers to see how different items complement each other.
7. Styled photography
Styled photography is all about creativity. Use props and backgrounds to create themed scenes around your product. It's perfect for social media ads. This style helps convey a lifestyle or mood. You can make your products more appealing by placing them in an attractive context that speaks to your target audience.
8. Infographic photography
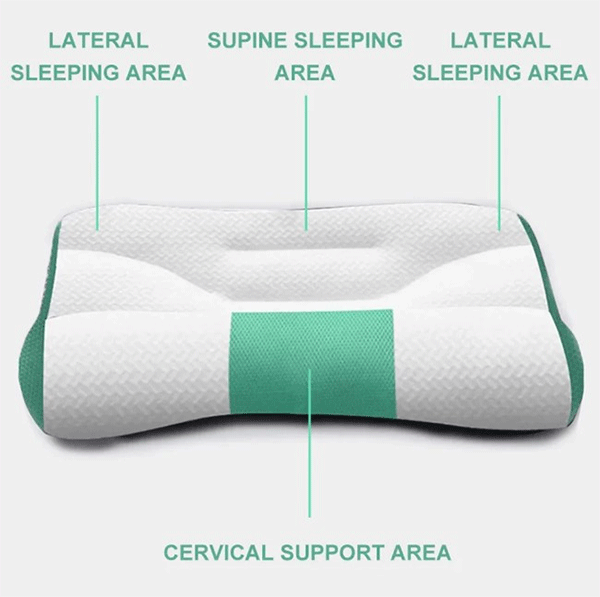
Combine photography with graphic elements like text, arrows, and icons. Infographic photography is great for explaining features and benefits directly on the image. It's a quick way to communicate key points and help customers understand what sets your product apart. This style is particularly effective for complex products that require additional explanation.
9. Macro photography
Macro photography captures extremely close-up shots of small products or details. It's particularly effective for jewelry, electronics, or any product where tiny details make a big difference. By focusing on specific aspects of the product, this style highlights the craftsmanship and intricate design.
10. Outdoor photography
Outdoor photography leverages natural light and settings to enhance your product's appeal. Perfect for outdoor gear, sports equipment, or travel-related items. This style creates a sense of authenticity and adventure. It helps customers imagine using the product in real-life outdoor scenarios.
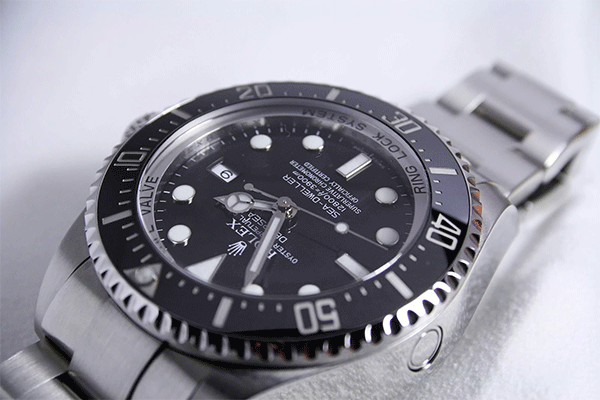
11. Reflective surface photography
Placing the product on a reflective surface creates a mirror effect. This can add sophistication and a premium feel. It's ideal for high-end products like watches and jewelry. The reflection adds depth and makes the image more visually appealing.
12. Action shots
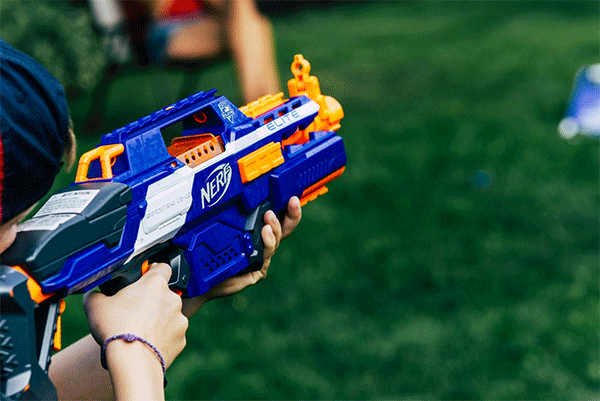
Action shots capture the product being used in dynamic, energetic settings.
It's an excellent choice for sports equipment, outdoor gear, or any product that looks best when it's in motion. This style demonstrates the product's functionality and performance. It helps customers visualize its use in active situations.
Tips for creating and optimizing product images
You need high-quality images. But they also need to be optimized for your website to ensure quick loading times and a smooth user experience. Here are some tips:
Use next-gen formats
Next-generation image formats like WebP can be a game-changer. These formats offer better compression and quality than traditional ones like JPEG and PNG. Switching to WebP can significantly reduce your image file sizes without sacrificing quality.
This means faster loading times for your website, which keeps visitors happy and can boost your SEO. It's a simple change that can make a big difference in how your site performs and how users experience it.
Consider hiring professional product photographers
Taking your own photos can save money. But hiring a professional photographer can elevate your product images to the next level. Professionals have the right equipment and expertise to capture your products in the best light.
They know all the tricks for making your items look their absolute best. Investing in professional photography can make a huge difference in how your products are perceived. It can be the deciding factor in convincing potential customers to make a purchase.
Easy-to-use photo editing tools
If you're looking for a tool to edit your product images, Canva is a great option. It's super user-friendly and offers a wide range of features, such as filters, cropping, and adding text or graphics.
It's perfect for quick edits and making your photos look professional without needing advanced skills. You can ensure all your images have a consistent look and feel, which is great for your brand's image. It's a simple way to polish your photos and make them stand out.
Using AI to generate or edit product images
AI tools can be a real time saver for enhancing or even creating product images. These AI tools can do everything from removing backgrounds to adjusting lighting. They can even generate realistic images of products based on sample photos.
This means you can get professional-looking images with minimal effort. It's a great way to ensure consistency and quality across all your product photos.
Optimizing image size
Make sure your images are the right size for web use. Large images can slow down your site, which is a big no-no for keeping visitors engaged. Use tools to compress your images without losing quality.
Aim for images under 200 KB. This will help your site load faster. Quick loading times are crucial for a smooth user experience and can make a big difference in keeping customers on your site.
Alt text for SEO
Don't forget to add descriptive alt text to your product images. This improves your website's accessibility for people using screen readers and also boosts your SEO. Alt text should accurately describe the product and include relevant keywords. This helps search engines understand what your images are about. It's a simple step that can make a big impact on your site's visibility and usability.
Multiple angles and views
Show your product from multiple angles. Include photos from the front, back, sides, and any unique features. This helps customers get a comprehensive view of the product. It can reduce uncertainty and increase the likelihood of purchase. The more your customers can see, the more confident they'll feel about buying.
Alternative option: Create photo-realistic digital images

If you don't feel like learning to use your light sources and such, you can also create photorealistic images by paying a specialized designer.
These professionals can create 3D images of a product from a basic sample photo. They don't even need to see the product in person to create the images. Just take a look at how realistic these images can be.
To have the job done correctly, it can cost anywhere between USD $50 and $400. You can use sites like Fiverr or Upwork to find graphic designers who can create photorealistic 3D images. Make sure to get a peek at their portfolios before paying. That way, you can know what kind of quality you can expect.
Drive sales with awesome product images
I just can't emphasize it enough. Your products are at least 5 times more likely to sell if you have a decent product image accompanying your sales copy. It really is imperative that you get the best quality possible for all of your offerings.
Great product photos can really make your products shine and boost your sales. But finding the right products is just as important. If you're on the hunt for reliable suppliers with top-notch products and fantastic images, the SaleHoo Directory is your go-to resource. It's packed with millions of products from over 8,500 vetted suppliers.
Ready to find great products and elevate your online store?
Join the SaleHoo Directory today!
And if you have any questions about product photography or anything else eCommerce, our friendly customer support team is here to help.
About this article
About the author


1 Comments